

Introduction
One of the most dangerous and prevalent side effects of diabetes is diabetic foot ulcers (DFUs). They happen when persistently elevated blood sugar damages nerves and lowers blood flow, resulting in skin deterioration, usually on the feet.
Because early detection saves limbs, prevents infections, and greatly improves healing outcomes, it is essential to understand the diabetic foot ulcer stages.
Understanding Diabetic Foot Ulcers
A diabetic foot ulcer is an open sore that develops as a result of repeated pressure or injury, poor circulation, and nerve damage (neuropathy).
These ulcers usually develop on the sides of the foot, heel, toes, or bottom of the foot.
Causes and Risk Factors
- High blood sugar
- Peripheral neuropathy
- Poor circulation
- Wearing improper footwear
- Foot deformities
- Previous ulcers
- Smoking
How Diabetes Affects Healing
Elevated blood glucose levels impede the healing process and compromise immunity, causing wounds to rapidly deteriorate.
The Importance of Staging Diabetic Foot Ulcers
Staging a diabetic foot ulcer helps:
- Choose the right treatment plan
- Predict healing time
- Identify infection risk
- Prevent advanced complications
- Reduce risk of amputation
The Wagner Ulcer Classification System is the most widely used technique for ulcer staging.
Diabetic Foot Ulcer Stages
Stage 1 – Pre-Ulceration / Callus Formation
This is the first indication that an ulcer might develop.
Symptoms
- Thickened callus
- Red or warm skin
- Dry cracks
- No open wound yet
Why it happens
Continuous friction, pressure, or neuropathy leads to dry, thickened skin.
What doctors check
- Loss of sensation
- Pressure points
- Footwear evaluation
Stage 2 – Superficial Ulcer
The skin breaks, exposing the upper layers of tissue.
How it looks
- An open wound
- Red surface
- No bone or muscle involvement
Treatment
- Cleaning
- Dressings
- Offloading (removing pressure)
- Footwear correction
Early treatment stops progression.
Stage 3 – Deep Ulcer (Skin + Fat Layer)
The wound gets deeper, reaching soft tissue layers.
Symptoms
- Numbness or pain
- Swelling
- Slough, or yellow tissue
- Unpleasant smell if contaminated
Evaluation
- X-ray to rule out infection of the bones
- Tests of culture
To prevent complications, prompt medical attention is crucial.
Stage 4 – Ulcer Involving Muscle, Tendon, or Bone
Now the ulcer is severe.
What happens
- Tendon or bone exposure
- severe infection
- Elevated risk of osteomyelitis
Clinical actions
- Debridement surgery
- IV antibiotics
- aggressive treatment of wounds
This stage needs specialist intervention.
Stage 5 – Gangrene / Severe Tissue Loss
The riskiest stage is this one.
Signs
- Tissue that is black
- Dead skin
- Transmission of infection
- Circulation loss
Risks
- Limb-threatening infection
- Amputation might be necessary.
Immediate emergency care is essential.
Other Ulcer Staging Systems
Wagner Classification
The most popular method grades ulcers according to gangrene and depth.
PEDIS Classification
Used globally; it evaluates:
- Perfusion
- The extent
- Depth
- An infection
- Feeling
Symptoms That Show Ulcer Progression
- A rise in redness
- Elevation
- The pus
- A bad odor
- Heat.
- Skin turnover
- Enhanced discomfort or diminished feeling
Any of these symptoms need to be treated right away.
Diagnosis of Diabetic Foot Ulcer Stages
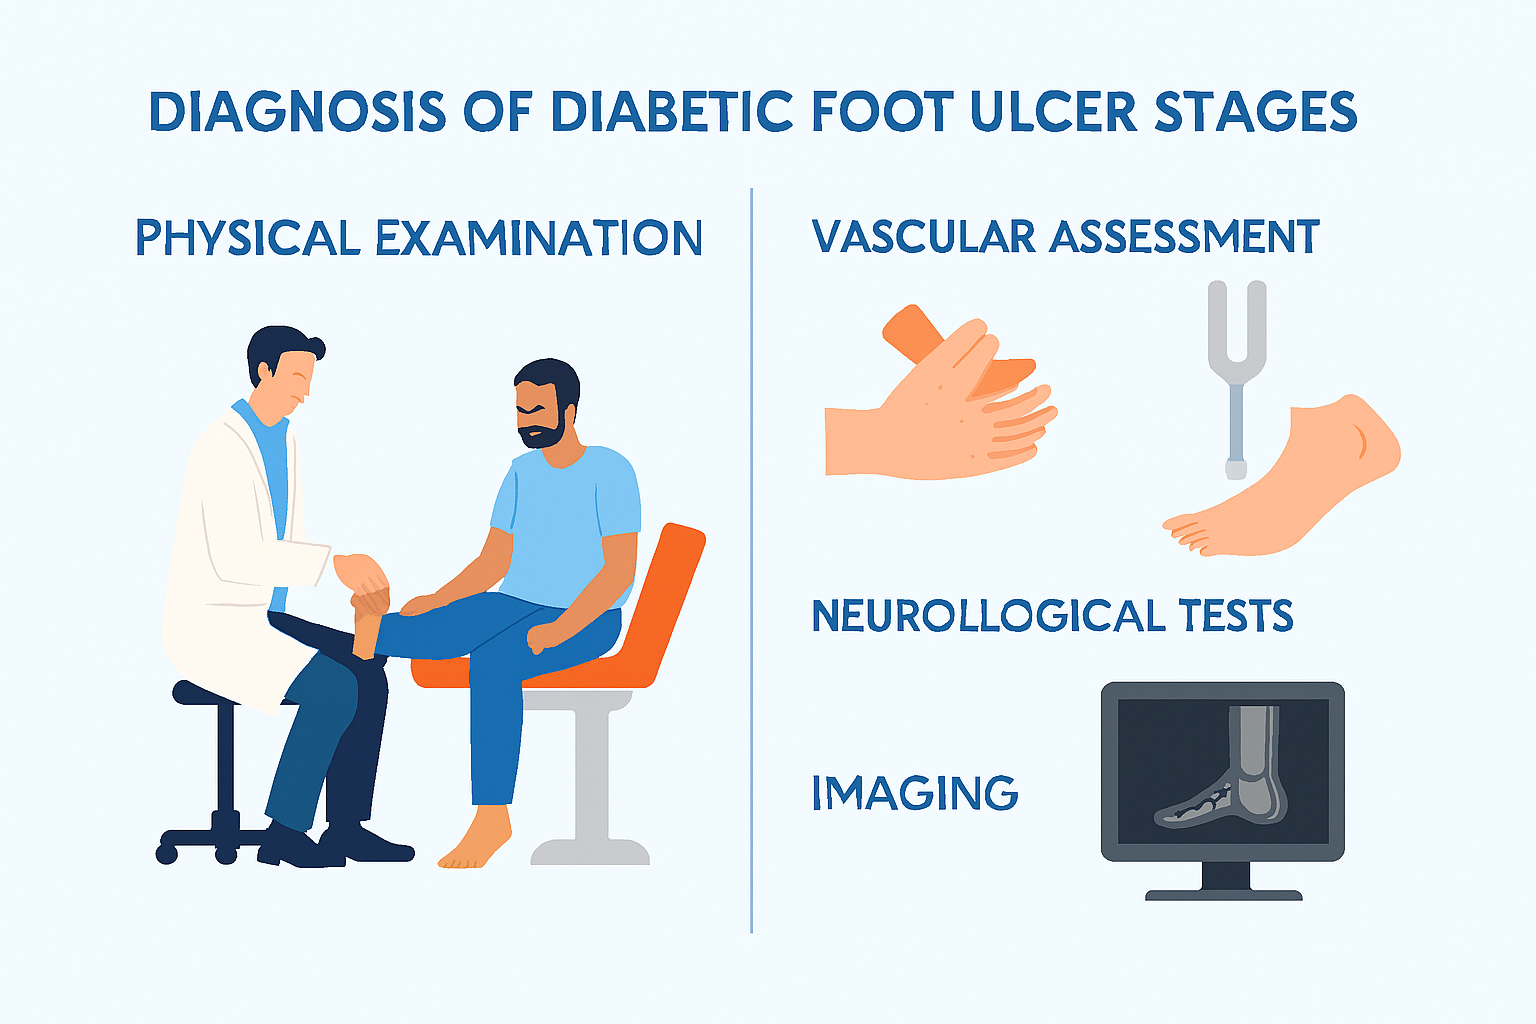
Physical Examination
Doctors assess:
- Wound depth
- Color and odor
- Fluid discharge
Vascular Assessment
- ABI test
- Doppler ultrasound
Neurological Tests
- Sensation testing
- Reflex checks
Imaging
- X-ray for bone involvement
- MRI for deep infections
Treatment for Each Ulcer Stage
Stage-wise Treatment
- Stage 1: Moisturizers, footwear, callus removal
- Stage 2: Antibiotics, dressings, offloading
- Stage 3: Debridement, wound culture, advanced dressings
- Stage 4: IV antibiotics, surgery
- Stage 5: Emergency surgery, possible amputation
Advanced Therapies
- Hyperbaric Oxygen Therapy (HBOT)
- PRP therapy
- Negative pressure wound therapy
- Skin grafts
Prevention of Diabetic Foot Ulcers
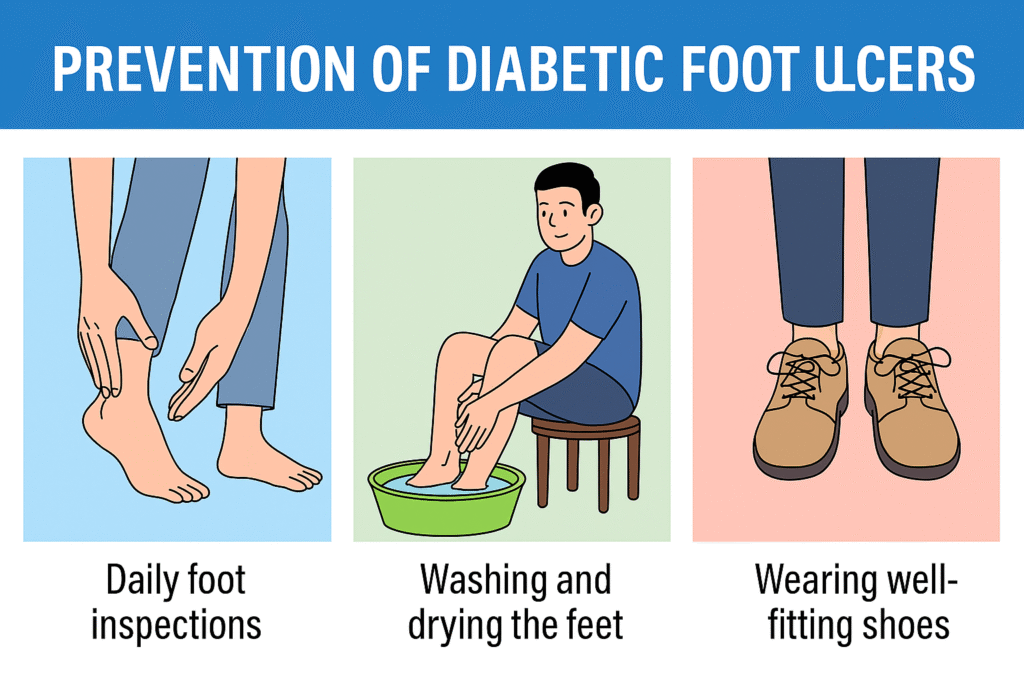
Daily Foot Care
- Wash and moisturize your feet.
- examine every day
- Carefully trim your nails.
Proper Footwear
- Avoid tight shoes
- Use diabetic footwear
Blood Sugar Control
- Maintain HbA1c in healthy range
When to See a Doctor
- If a wound doesn’t heal in two to three days
- Foot pain or swelling
- signs of infection
- Bluish or black skin
Conclusion
From callus formation to severe gangrene, diabetic foot ulcers develop in distinct stages. Understanding these stages helps it simpler to identify issues early and select the best course of action. The majority of diabetic foot ulcers can heal and complications can be avoided with appropriate care, regular foot examinations, and effective blood sugar management.
FAQs
1. How long does it take for a diabetic foot ulcer to heal?
Depends on the stage, ulcers can heal in a matter of weeks or months.
2. Can foot ulcers caused by diabetes be healed?
With proper treatment, the early stages can fully recover.
3. Do foot ulcers develop in all diabetics?
No, but neuropathy and poor sugar control increase the risk.
4. Is amputation absolutely required at Stage 5 every time?
Severe cases may need it to stop the infection, but not always.
5. Which doctor treats diabetic foot ulcers?
podiatrists, wound care specialists, diabetologists, and vascular surgeons.